Install for Phoshop CS4
Fundy Album Builder and Workflow install the same way. Please follow these instructions regardless of program.
Unzip the Install package
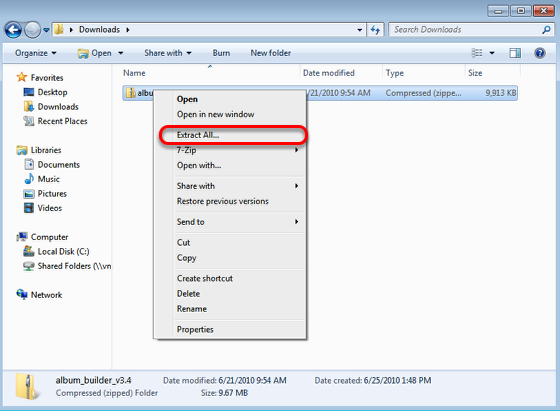
Right click on the trial package and choose "Extract All".
Extract the folders contents into the directory.
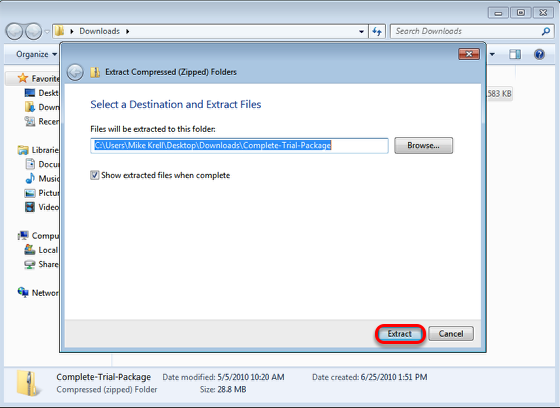
After click "Extract All", you will be prompted with the Extraction Dialog. The default directory will be the same as your source file. Click "Extract".
Extract the files to the a folder.
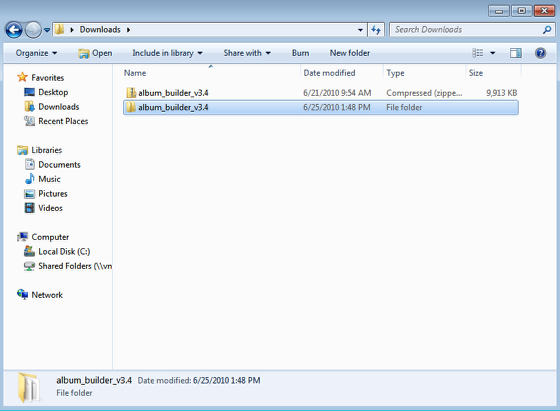
Once you have extracted the folder, open it and find the Work Flow.zip file. (Album Builder pictured here, but it will say Work Flow)
Open Adobe Extensions Manager as "Administrator"
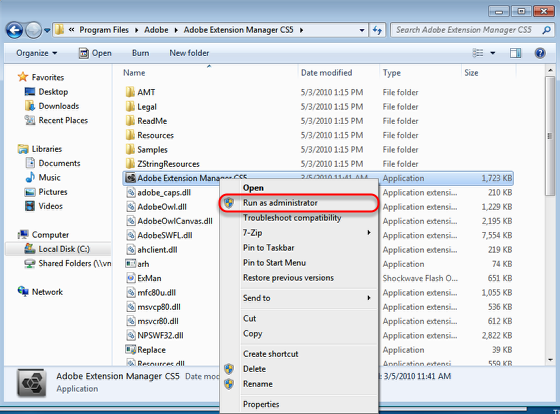
This is the most important part of installing Work Flow in a Windows OS environment. Navigate to Program Files>Adobe>Adobe Extensions Manager CS5. Right Click and chose to "Run as administrator". Failure to follow this step will not allow you to install. A user permissions error will occure.
Choose "Install" from inside Extensions Manager
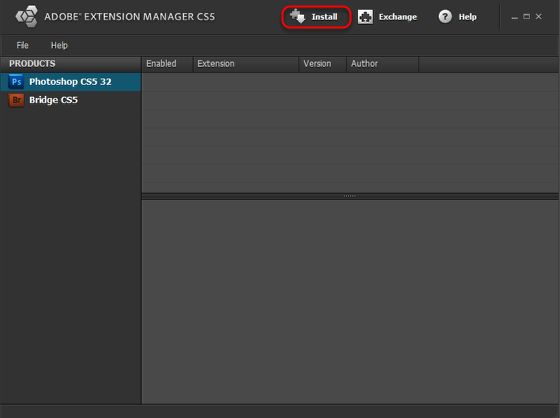
Click the "install" button, located at the top of extensions manager.
Navigate to the CS4 Install folder.
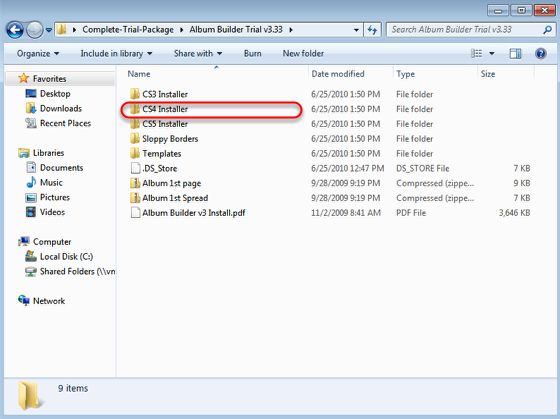
After clicking "install", you will be prompted to select the file to install. Navigate to the CS5 Installer download folder.
Choose the install file.
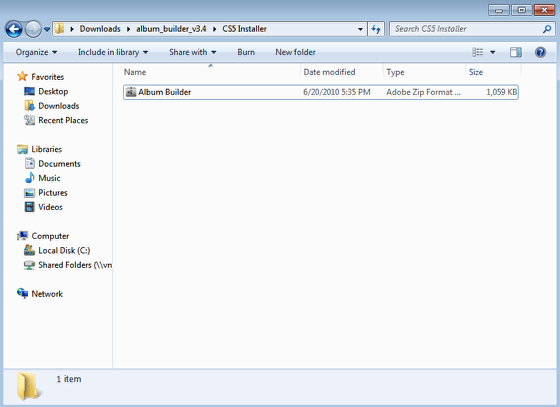
Select the .mxp file and click "Open". (Album Builder pictured here, but it will say Work Flow)
Continue through the prompts
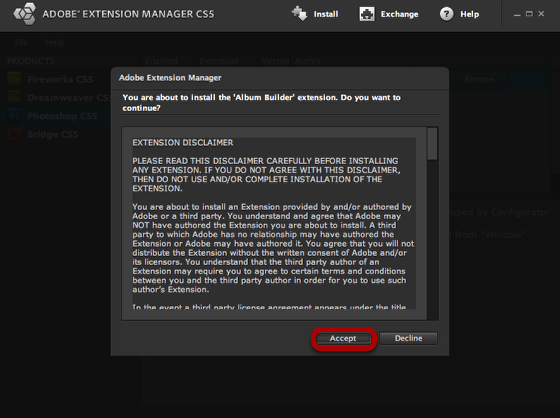
Click "Accept" and extensions manager will install the file into your extensions. If you had a previous version of Album Builder, It will prompt you to overwrite the file.
Verifiy that the installation was successful
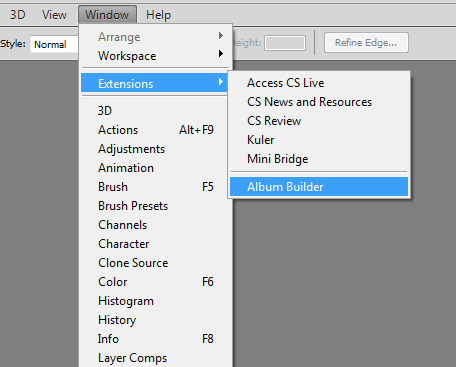
Open Photoshop, and navigate to Window>Extensions. Verify that Work Flow is installed. (Album Builder pictured here, but it will say Work Flow)