Using Fill Advanced
Fill Advanced gives you a lot of options when filling your grids. From applying presets and actions, to merging the selected masks. Explore the features of Fill Advanced.
Select "Fill Advanced"
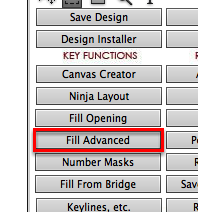
After selecting your box you would like fill, click "Fill Advanced" on the Album Builder Panel.
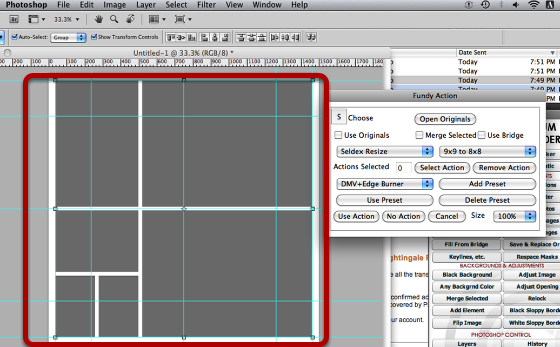
Note, all boxes are selected, then I hit Fill Advanced. The dialogue box comes up.
Fill Advanced Dialogue Box
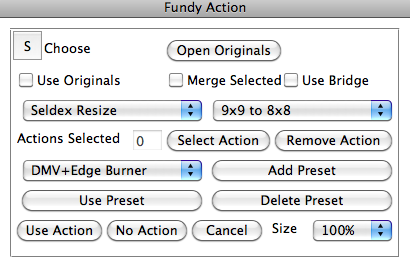
This dialogue is one of the more complex and powerful available. Let's go through the choices one by one.
Fill Advanced Dialogue Box Settings
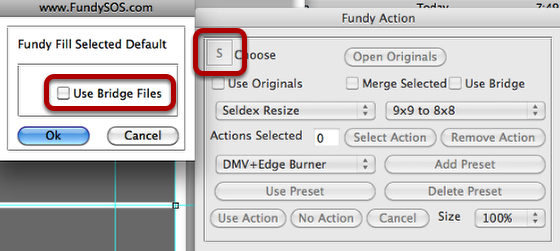
The settings button, let's you choose to have "Use Bridge" selected by default.
Open Originals
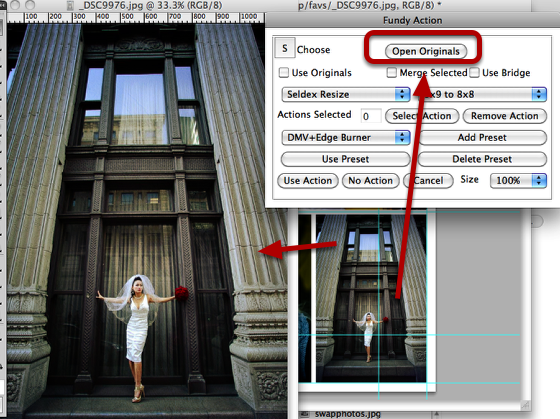
If you need to open the original file from within Fill advanced you can.
Use Originals
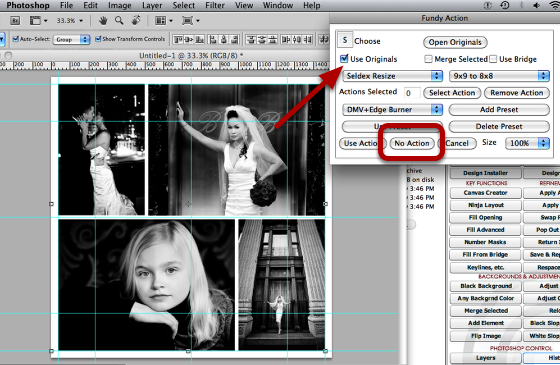
This options was created for a very specific time.
We recommend designing from color files and changing into BW within Album Builder. Because, there are always clients that want to go back to the original color. This option makes it easy. Just tick it and hit "No Action"
Album Builder will replace the images with the original color images.
Merge Selected
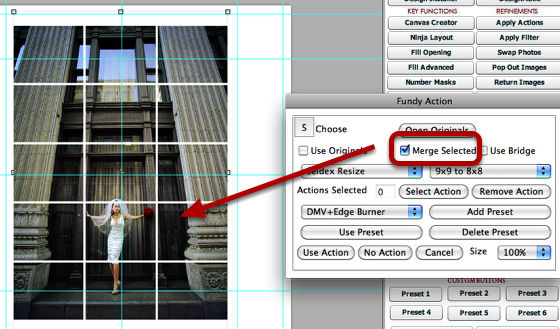
When you check merge selected, it will merge all of the boxes into one mask, letting you add one image to all the boxes. You can see the result on the left.
Use Bridge
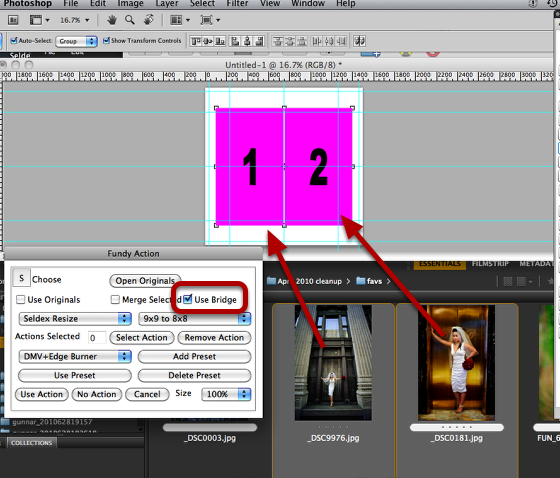
In addition to filling from the finder, you can also fill from Bridge. Before filling from Bride, we recommend Numbering the Masks. (see how here). Fill Advanced will use photos selected in Bridge. And it will fill them in order. You see that I have two items selected in Bridge. The first one will go into mask one and the second one will go into mask two.
Adding Actions Options
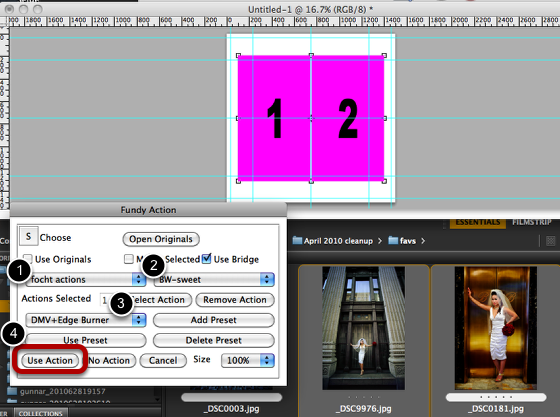
To add an action, in the example a BW action, simply select the action set (1), then the action (2) and hit the "Select Action" button (3). Then when filling, use the "Use Action" button (4).
Using Actions - Result
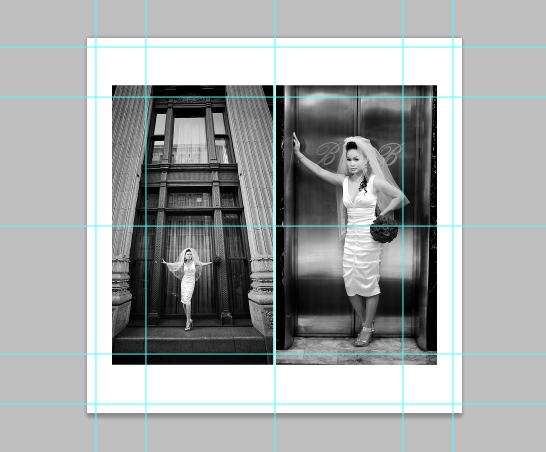
As you can see, the BW action was applied as the images were added to the design. Über-cool.
Adding More Than One Action
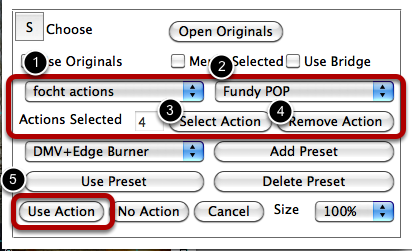
It's easy to 'stack' acdtions on top of each other. Just choose the action set (one) then the action (2) and hit the "Select Action" button (3). You can just keep doing this. You can see that I have selected 4 actions in the "Actions Selected" box. If you want to remove the last action added, just hit the "Remove Action" (4) button.
When all of your actions are choisen, hit the "Use Action."
Adding Presets
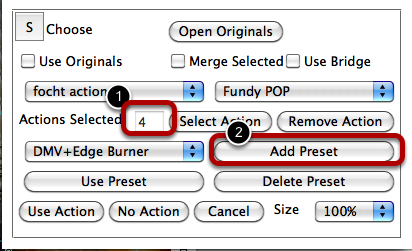
At any time, you have a stack of actions, you can add those as a preset, to use over and over again. Just click "Add Preset" and name your preset. It will then appear in the drop down list.
Using Presets
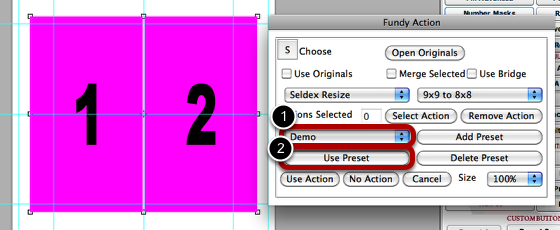
Select your masks (these are numbered, but not necessary). Select your preset (1) and click use preset (2). Album Builder will then fill using your selections.
Deleting Presets
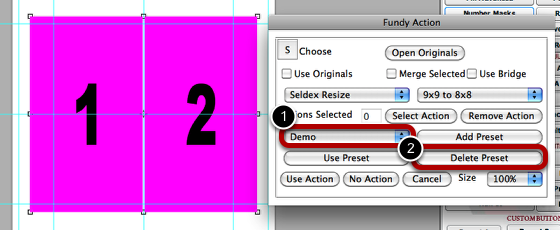
At any time you can delete a preset. Simply select the preset (1) and click 'delete preset' (2).
Presets available through the Fundy SOS suite
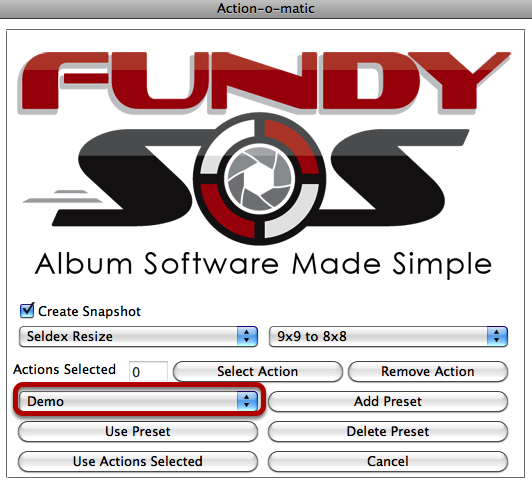
Remember, any preset you create is available throughout the Fundy SOS suite of products.